Category

DIY & Handmade Projects

Step-by-step guides for everything from home decor to hand-sewn garments. Accessible projects with heirloom-quality results.

Brown and black happy birthday card lot

There’s something incredibly satisfying about giving forgotten materials a second life, especially when they transform into something unexpectedly beautiful. This week, I challenged myself to create a zero-waste crafting project using only scraps from previous DIYs — leftover fabric strips, tiny yarn pieces, paper cuttings, and even old packaging. What I ended up creating was a charming patchwork wall hanging that now brings so much warmth to my workspace.

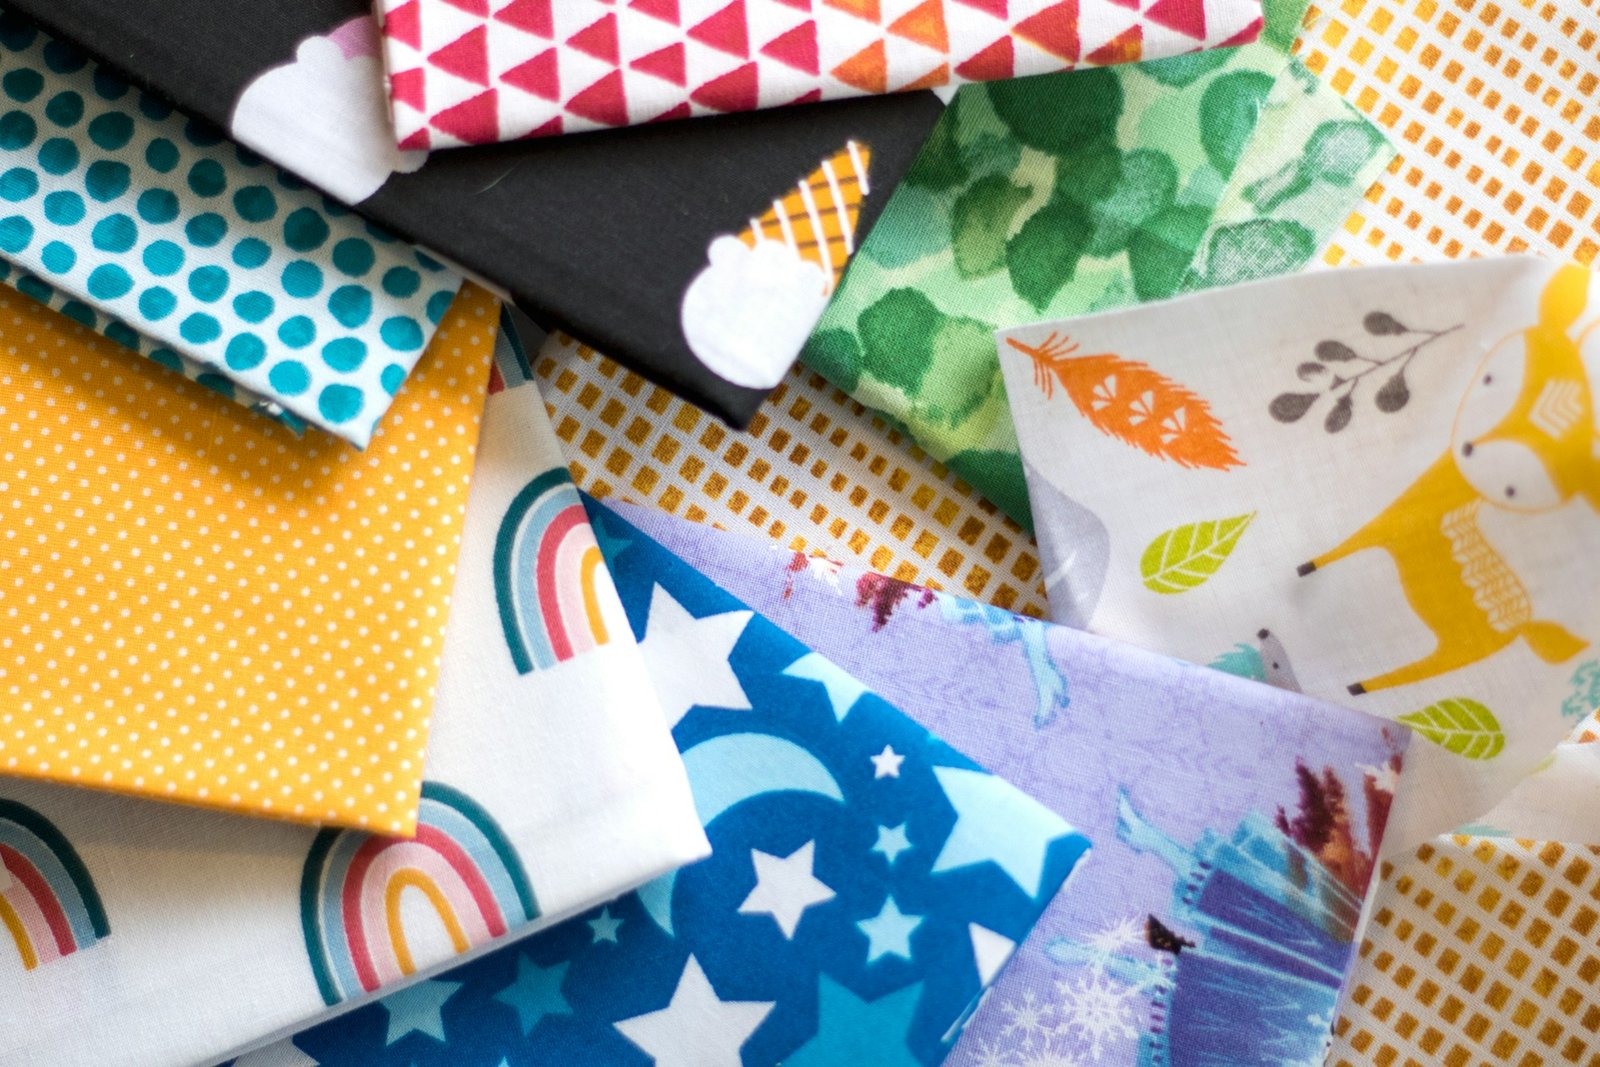
Before starting, I spread everything out on my desk and let the colors lead the way. It’s crazy how even the smallest items — a frayed ribbon, a button the size of a coin — begin to feel full of potential when you pair them with the right textures. My rule was simple: no buying new materials. The goal wasn’t perfection but playfulness.

Brown and black happy birthday card lot
This is a caption

I began by selecting a neutral backing fabric. Then I stitched and glued layers of scraps together, almost like painting with texture. Little by little, it started to look less like a pile of leftovers and more like a story. Each piece reminded me of previous projects — a pillowcase I made last fall, a journal cover I gifted to a friend, the skirt I never finished but loved anyway.

The beauty of zero-waste crafting is that it invites experimentation. There’s no pressure to follow a tutorial or match someone else’s aesthetic. You can bend the rules, make mistakes, and discover new styles you didn’t know you had in you. And because these projects feel more personal, they tend to add a sense of authenticity to your space.

Once finished, I attached a simple wooden dowel and hung the piece above my desk. The colors, shapes, and uneven edges make me smile every time I see it. It’s a textured reminder that creativity doesn’t need perfect conditions — just intention and a willingness to play.

If you’ve been collecting scraps (or accidentally hoarding them like I do), consider making your own zero-waste wall hanging. It’s affordable, sustainable, and genuinely therapeutic. And who knows? The next time you look at your leftover crafting pile, you might see a masterpiece waiting to happen.

A pile of different colored fabrics on top of each other

There’s something magical about giving new life to leftover materials—especially fabric scraps that pile up after bigger sewing projects. Instead of letting them sit in a basket forever, why not turn them into something practical and pretty? Patchwork coasters are the perfect small-scale craft: quick to make, endlessly customizable, and a sweet addition to any coffee table. Plus, they make thoughtful handmade gifts for friends who appreciate cozy, intentional details.

Start by gathering your fabric scraps in coordinating colors. I love leaning into soft pastels and warm neutrals, but high-contrast prints can be just as charming. Choose pieces that are at least a few inches wide so you have room to trim and seam them. You’ll also want cotton batting or felt for the lining, thread in a complementary color, and (if you’re feeling fancy) decorative edge stitching to finish the look.

A pile of different colored fabrics on top of each other
This is a caption

Lay out your scraps and start creating small patchwork “blocks.” Don’t worry too much about being perfect—organic, slightly mismatched shapes are part of the charm. Sew each piece together right-sides-facing, press your seams flat, and then trim your block into a neat square. Repeat until you have a little stack of patchwork squares ready to become coasters.

Next, layer each patchwork square with batting and a backing fabric. Sew around the edges, leaving a small gap so you can turn the coaster right-side-out. Once flipped, press your edges crisp and sew a top-stitch around the border to close the gap and add structure. If you want to elevate the design even further, try stitching a simple decorative shape—like a heart, wave line, or starburst—across the center.

Before you know it, you’ll have a charming little collection of coasters that look perfectly mismatched in the best way. Set them out on your coffee table with a stack of books and a candle, and admire how something so simple can add warmth to a space. This is the kind of project that reminds you: creativity doesn’t require fancy tools—just imagination and what you already have.

And the best part? Once you’ve made your first set, you’ll get hooked. These coasters are addicting in the sweetest, most wholesome way. They’re the ideal weekend craft and a beautiful reminder that small touches can make a home feel personal and lovingly curated.

Α group of three vases sitting on top of a table

If you’ve been craving a relaxing weekend activity that adds personality to your home, hand-painting terracotta pots is a wonderful place to start. Terracotta has such a warm, earthy charm on its own, but with a little paint, you can turn each pot into a tiny piece of art. Whether your style is minimal, whimsical, or floral and feminine, this project lets you explore without pressure—and the results are always delightful.

Begin by choosing a few terracotta pots in different sizes. Give each pot a quick wipe with a damp cloth to remove dust, and let them dry fully. Terracotta is porous, so I highly recommend applying a thin coat of primer before painting; it helps the colors look brighter and prevents the paint from soaking in unevenly. Once primed, your pots are ready for creativity.

Α group of three vases sitting on top of a table
This is a caption

Pick a color palette that makes you smile. Since your website uses modern pastels, imagine soft blush pinks, warm creams, gentle sage, and dusty lavender. Acrylic paint works beautifully for this project. Try stripes, arches, dots, florals, or abstract shapes—whatever feels natural. Don’t worry about perfection; handmade things are meant to have personality.

As you paint, think about how your patterns will look with the plants you plan to use. A leafy green fern paired with a clay pot featuring white polka dots? Adorable. A cascading pothos sitting in a creamy pot with hand-painted blush botanical lines? Pure joy. Try mixing simple designs with more intricate ones to create visual contrast when they’re grouped together.

Once your design is complete, let the paint dry fully, then seal the pot with a matte or satin finish to protect your design from moisture. This last step is essential if you’ll be watering plants while they’re in the pot. If you’re gifting your painted pots, a sealed finish also helps them feel more polished and professional.

In the end, what makes this craft so wonderful is its calm, meditative nature. There’s something grounding about sitting with a brush in hand, painting small and simple shapes. When you’re done, you’re left with something beautiful, useful, and uniquely yours—perfect for a shelf, windowsill, or cozy corner in your home.

Α lit candle with melting wax drips

Every home deserves a corner dedicated to slowing down. A reading nook isn’t just about books — it’s about creating a tiny sanctuary where you can unwind, reflect, and escape into another world. Whether you live in a small apartment or a spacious home, all you need is a comfortable chair, soft lighting, and a little imagination to make it your own.

Start with the right spot. Look for a quiet corner near a window if possible — natural light instantly makes the space feel calm and inviting. A soft armchair, a deep-cushioned bench, or even a few oversized floor pillows can become the foundation of your nook. What matters most is that it feels comfortable and personal to you.

Α lit candle with melting wax drips
This is a caption

Next, layer in warmth. Add a plush throw blanket, a few textured cushions, and a small rug underfoot. These small touches create that cocoon-like feeling we all crave during moments of rest. To bring in extra charm, place a small side table nearby for your coffee or tea — and don’t forget a candle or diffuser for a subtle, soothing scent.

Lighting plays a huge role in setting the mood. If your nook isn’t near a window, choose a lamp with a warm glow rather than harsh white light. A floor lamp with a linen shade or a clip-on reading light can work wonders. Dimmable bulbs are an easy way to control the atmosphere and make your space feel cozy at any time of day.

Finally, add a personal touch. Stack a few of your favorite books, frame a small photo, or bring in a potted plant for a hint of life and color. Your reading nook should reflect you — not perfection. It’s a space to recharge, dream, and find quiet joy in the simple pleasure of turning a page.